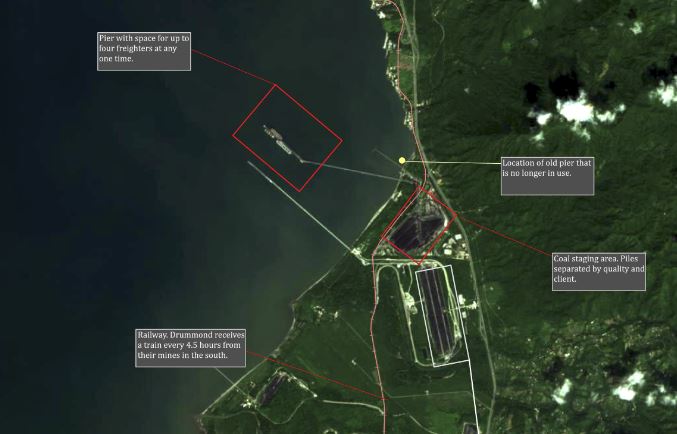
In a recent trip to Colombia, I had the opportunity to tour Puerto Drummond in Santa Marta. The port receives coal via train from their mines further south and sends out coal around the world. In order to provide a geographic context to this operation, we can use satellite imagery to analyze the operation, from mine to port.
Finding and processing satellite imagery however can be a challenge. In a previous post, I discussed the cost of high resolution satellite imagery and how it can be inaccessible for independent analysis. Luckily there are other options, like Sentinel 2 imagery. It is only 10m spatial resolution but that is sufficient for our purposes. And using ArcGIS Pro and the Sentinel 2 image service from ArcGIS Online Living Atlas, you can query, visualize, and export imagery directly.
The first step is to ensure you are signed in to ArcGIS Online through ArcGIS Pro. Most users will already be as ArcGIS Online will be their active licensing Portal. Then, through Catalog, click ‘Portal’, then ‘Living Atlas’ and search for ‘Sentinel 2’:
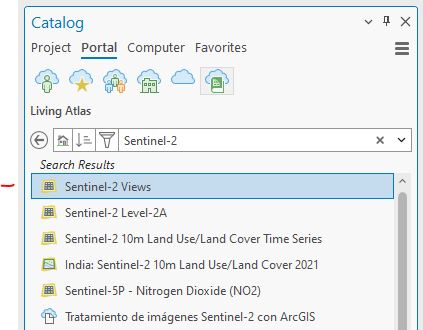
Right click the layer and add it to a new map. You can then zoom to your area of interest. Because this is an image service coming from ArcGIS Online, there are many different processing templates available which can alter the rendering of the layer. In addition, it is important to remember that this is a mosaic dataset. So there are Overviews involved, which work to speed up rendering at different resolutions. Our job is to get to the source raster and export it so we can use it and manipulate as needed.
My preferred method is to use the Select tool and use a rectangular selection to select my general area of interest. Then, through the Attribute pane, I can view the attributes for the individual rasters that make up the service for this area:
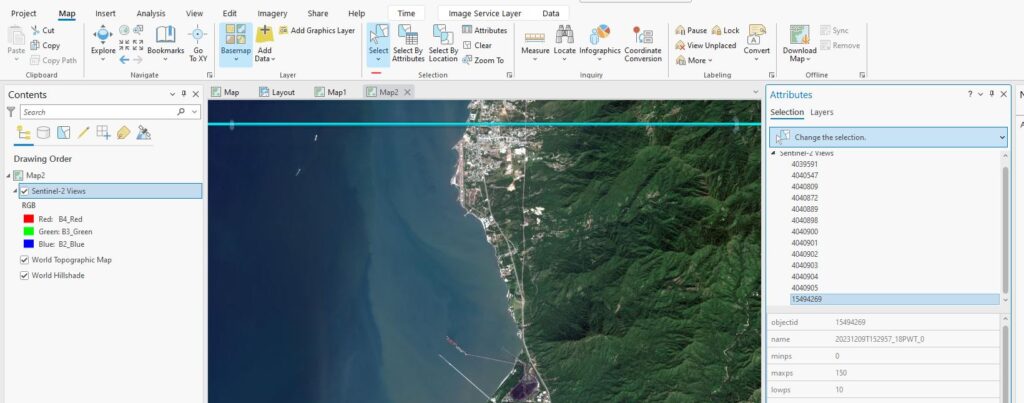
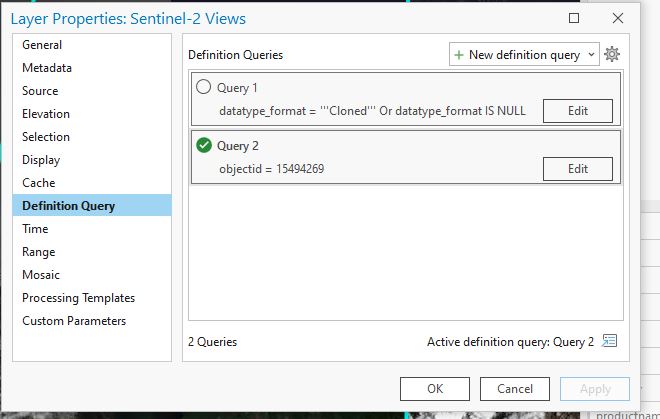
You can see in the image above that the item with objectid 15494269 is the actual source image. All of the other images are overviews. You can then take this objectid and use it to set a Display Filter:
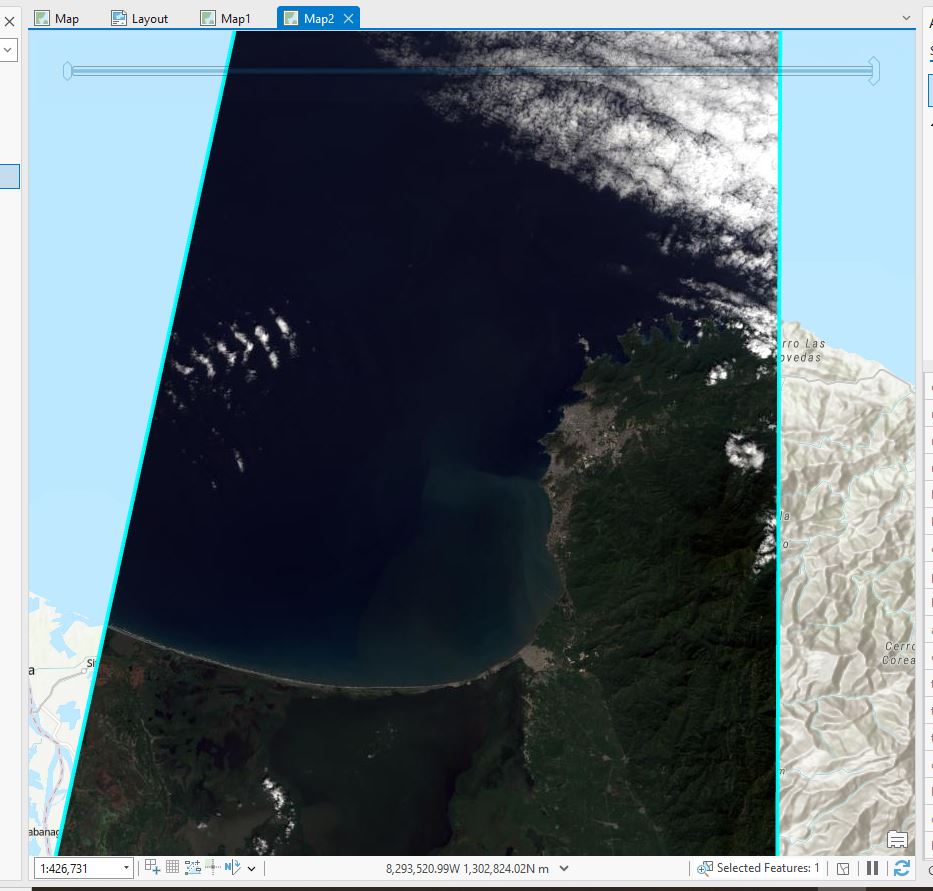
The result is the actual underlying image:
Unfortunately we can’t export the whole image as this would put unnecessary demands on the service. But we can export an image 5000 x 5000 pixels. The key part to remember is that we are looking at the default processing template, which is a Dynamic Range Adjustment (DRA). If you export the raster with this template applied you may see strange outputs. You will need to first change the template to Natural Colour before exporting (right-click image layer > Properties > Processing Templates):
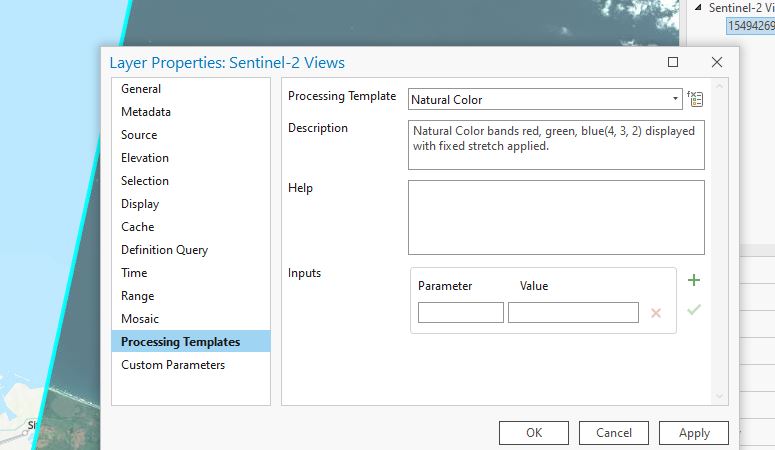
It may not look as nice but don’t worry! We can enhance the symbology afterwards. Now, right-click the layer > Data > Export Raster. By default, the clipping extent will be too large and the cell-size won’t be correct. The red highlights warns you that you can’t export more than 5000 x 5000 pixels:
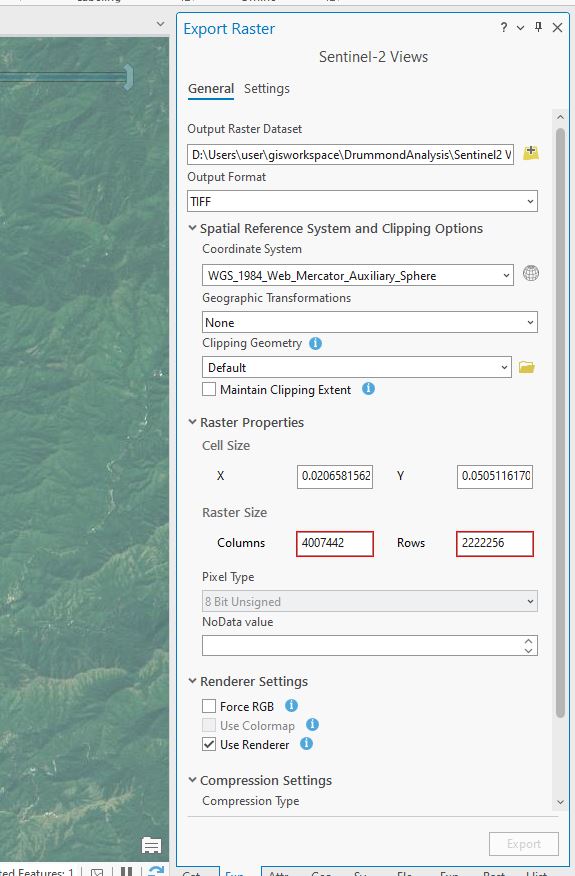
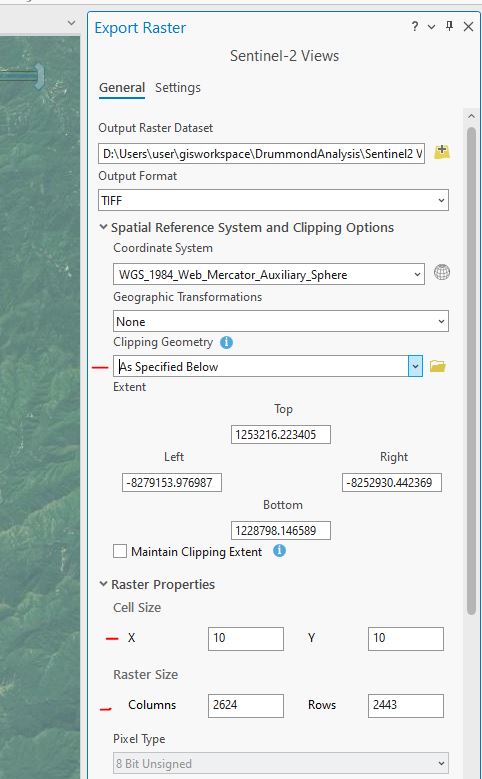
Change the cell size to 10 x 10 and modify your extent to ensure you have a correct image size. Then, click ‘Export’. You can now use your image for image analysis and to create maps.
