Geoserver layer preview.
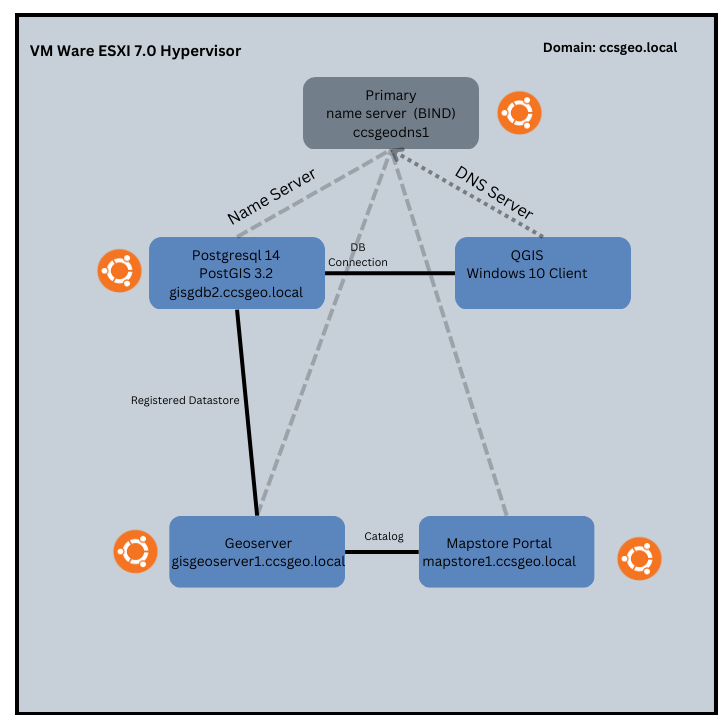
In part 3 of this series, we walked through how to deploy Geoserver, an Open Source GIS Web Server that can be used to serve out geographic data over the web. In this section, we will go over how to add data from our PostgreSQL database we deployed in part 2. Connecting the two components together provides a powerful framework for publishing and sharing geographic data.
Adding PostgreSQL as a Datastore
The first step in publishing layers from PostgreSQL is to register the database as a Datastore in Geoserver. Datastores reside in Geoserver within Workspaces, which allows for the organization of similar items. As an initial step, you will first need to create a new Workspace:
https://docs.geoserver.org/main/en/user/data/webadmin/workspaces.html

With our Workspace made, we can now add a new Datastore to it:

On the New Data Source page, choose “PostGIS – PostGIS Database”. This will bring you to the next page where you can fill out your datastore information:

In the example above, I set the Workspace to the test_workspace created previously, and provided a name for the new datasource. I entered in the hostname for the machine as well as the port and the database name. In this case, I want to connect to a single schema, and connect with my ccsgeoprod user. One other important thing to note is that in the Connection Properties, I also need to set the SSL mode to ‘Allow’ as this is how we have configured our PostgreSQL database connections (see part 2):

Now, click “Save” at the bottom of the page.
Adding a New Layer
After Saving, you will then be prompted to publish any existing layers that exist within the chosen schema. Let’s skip past this and click on the ‘Layers’ tab in the menu on the left-hand side of the page. Here we have an option to add a new layer:

We will then be prompted to choose a Workspace/Datastore combination. Because Workspaces can have multiple datastores, you can choose which datastore you want to publish from. The naming convention is workspace:datastore. I chose test_workspace:test_datasource and clicked “Publish” beside my chosen layer:

Now, we are presented with a lot of options for publishing the layer. There are a ton of options and you can review them here as needed:
https://docs.geoserver.org/main/en/user/data/webadmin/layers.html
Really, the only parameters you will need to watch out for are the Bounding Boxes, which you can compute from the data and native bounds:

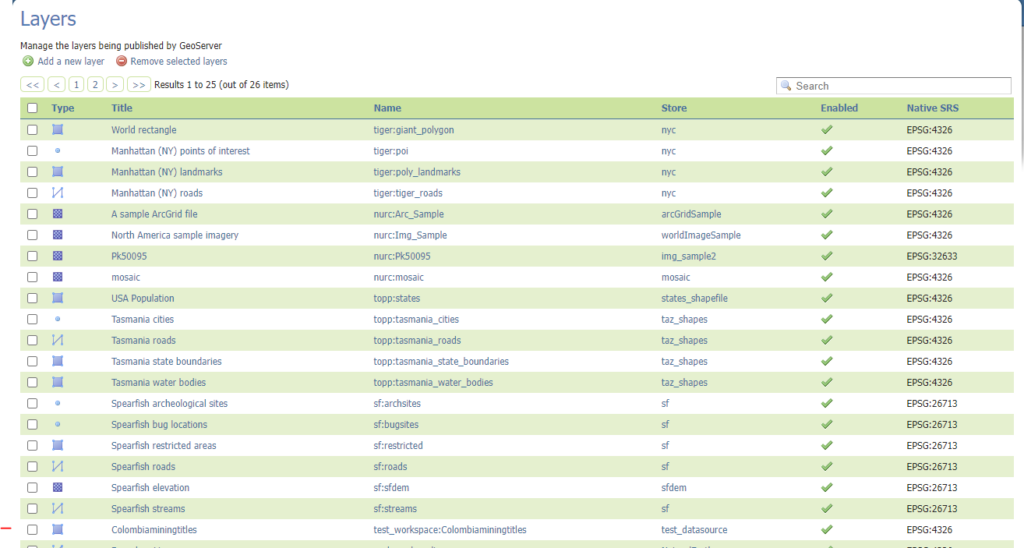
You won’t be able to publish the layer without these set. You can now click ‘Save’ and you are brought back to the Layers page:

Our layer is now shown in the Layers list. We can then click on the Layer Preview option in the left-hand menu and view our new layer rendered via OpenLayers:

We can now use our layer in web maps and applications!
In this post, we stepped through adding a new PostGIS Datastore and publishing a layer from that datastore. This functionality is a powerful tool for publishing your GIS data to the web and allows for quick access to your datasources. Now, when data is edited in the database, it is reflected immediately through your service, allowing for real-time updates and authoritative data sharing. Stay tuned for Part 4 where we will finally deploy our final piece of the Open Source GIS stack – Mapstore!


